Showing posts with label Spoonflower fabric. Show all posts

Tuesday, August 3, 2010

I'm in the fabric business!

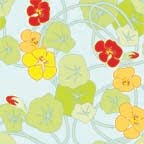
Nasturtium fabric in 4 sizes + polka dot accent fabrics.
I've wanted to design fabric for years, but the cost of having small portions of fabric printed was pretty expensive.   Since Spoonflower came along though, I've been having a great time making things with my own fabric.  Thank you Spoonflower!  I hope you have a long and prosperous life.

Spoonflower recently started a program to let fabric designers sell their fabric to others, so I put my Nasturtiums fabric for sale and then forgot about it for a while until I needed to upload a design for a baby blanket that I was making for a friend.  When I logged on, I was delighted to find that lots of people had been buying my fabric!

That was inspiration enough for me!  I designed more fabric to sell and have lots more in the works.

Spoonflower prints each fabric order on demand-- just specify the amount of fabric and type of cloth you would like to have and Spoonflower makes it and sends it to you.  I love that there is so little waste involved in the process--no unsold inventory.  I've been extremely happy with the extra-careful printing quality, the quality of cloth and how it stands up to washing and other abuse I subject it to.  You can choose basic cotton (quilting weight), stretch knit, cotton-linen blend (my favorite), upholstery fabric, sheer cotton lawn, and more.

You can find my fabrics at http://www.spoonflower.com/profiles/anntuck.  Since my Nasturtiums design is so popular, I decided to offer some polka-dot accent fabrics that go with it (I love polka-dots),  I'm also offering the Nasturtiums in different sizes.  Nasturtiums (great size for everything from quilts to garments), Nasturtiums Petite (nice smaller print with a Liberty of London feel--for smaller applications like doll clothes, or shirts, or anywhere you would use a calico print.), Nasturtiums Bold (use where you would like a bolder print--perhaps a skirt), and Nasturtiums Jumbo (could be used for drapery or bedding).

I've also finished some other designs that I really like.  More on that later.

Monday, June 15, 2009

Father's Day T-shirts


It started a couple of years ago with this shirt. (Who does this guy's laundry?) We went from "what should we give Dad for Father's Day?" to grabbing a T-shirt and some acrylic paint. (which works great on T-shirts, by the way. No need for fancy fabric paint--the inexpensive craft acrylics that come in bottles work great for T-shirts)


The kids didn't spend much time of this shirt. With a couple of drips of blue paint for eyes, the blobs quickly turned into creatures. Dad loves this shirt. LOVES it. He wears it all the time.


This is a great project for very young kids. Just remember to protect their clothing, because the paint will never come out. I find that limiting the palette prevents muddy colors. Other than that, just stretch the shirt over a board, give the kids a brush, and let them go.

Now... how to top that last shirt! I have been itching to do some applique--I never dreamed it would be for something for my husband. Keeping the creature theme that worked so well before, I asked the kids to draw some monsters. Our six-year-old drew a one-eyed monster straight away, but our three-year-old just made some scribbles--No problem, the scribbles looked very creature-like. We found a flying creature and a mushroom-headed lizard creature in them.


I dug out a precious scrap of my Spoonflower fabric (can't waste those!!!) and we used Steam-a-Seam2 double stick fusible web to make the creatures into fabric "stickers". We slapped them on the shirt and then I pressed them with the iron and sewed around the edges. We added some button eyes and we were done!


He'll get the creature drawings as a Father's Day card.


Shhhhhhh! Don't tell him what he's getting!


Wednesday, February 4, 2009

Sewing Instructions for Girl's Flirty Skirt


I scribbled down these instructions for the girl's flirty skirt I showed in an earlier post. The skirt is made with the Spoonflower fabric I designed. Skirts are very easy to make, and this design with the elasticized waist will fit through several growth spurts--today's knee-length skirt will be tomorrow's mini.


The pattern for this skirt consists simply of three rectangles, and can be made by an absolute beginner. I tried to make the directions for beginners to use, but if there are any confusing parts please let me know. I'd love to see how your skirt comes out using this pattern--send your photos and I'll post them here.

For a young girl, like my three-year-old daughter with a 19'' waist, you can make this skirt out of two fat quarters (21"x18" sold to quilters) of fabric.


1. Take two body measurements (in inches):

a. Measure around the waist (or widest part, ie. hips, thigh..)
b. Measure from the waist down to where you want the bottom of the skirt to be. (best to keep the top of the ruffle above the knee so the skirt is easier to run and play in.)


2. With a as the waist measurement, and b as the length measurement:
Cut two rectangles for the main part of the skirt (ax.5)+3.5" by (b-1"). In other words, (half of the waist measurement plus 3.5") by (the length measurement - 1").


Cut one rectangle for the ruffle 3 3/4" by (a+6")x2.5 (In other words: the waist measurement plus 6" times 2 1/2.). You will probably have to piece two pieces together to have a strip that is long enough--in that case, just add an inch to the length. It is not so important that the length of the ruffle be exact.


3. With right sides together (the printed faces of the fabric touching each other), make seams 5/8" from the edges as shown.


4. Press the seams open with an iron.


5. With right sides together, sew the ends of the ruffle piece together (and sew on any pieces you may have had to add on to get the the length you needed). Press open the seams.


6. Hem the ruffle by folding up the bottom 1/4", then pressing, then folding up 1/4" again, then pressing, then sewing along the edge.


7. To gather the ruffle, baste (sew with large stitches) 5/8" from the top of the edge, and then again 1/4" or so from the edge. (Offset the start of the 1/4" stitching from the start of the 5/8" stitching by a few inches if you want the ruffle to be nice and evenly gathered)


8. Gently pull the ends of the threads to gather the ruffle until it is the same size around as the main section of the skirt.


9. Pin the ruffle to the skirt with right sides together. Sew (don't forget to set your stitch length back to normal after basting) together, stitching on top of the 5/8" basted stitches. Remove basting that shows on right side. Press seam toward the top of the skirt.


10. To make the elasticized waist, fold over the top of the skirt 1/4" or so, press, then fold over again 3/4" (or more if the elastic is wide), and press. Sew a seam along the edge of the fold, leaving an inch or so gap between the start and finish of the seam for inserting the elastic.


11. Attach a safety pin to the end of a piece of elastic (to make it easy to feed through) and feed in through the folded over stitching. Adjust the length of elastic and sew the ends together.


12. Done!